How to Install cieTrade Add-in in
New Outlook for Windows
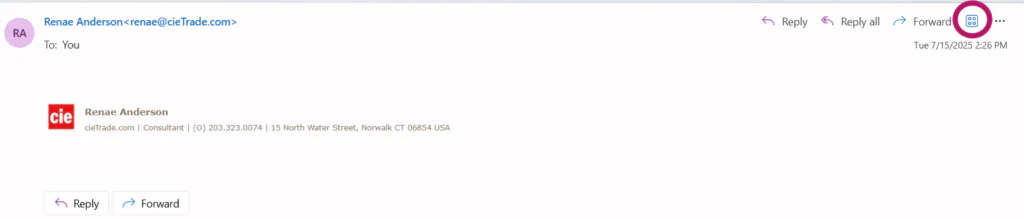
1. Click on an email. On the right hand side of the header, click the Apps icon as shown below:
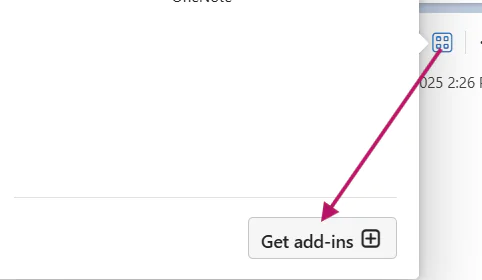
2. Then click Get add-ins+
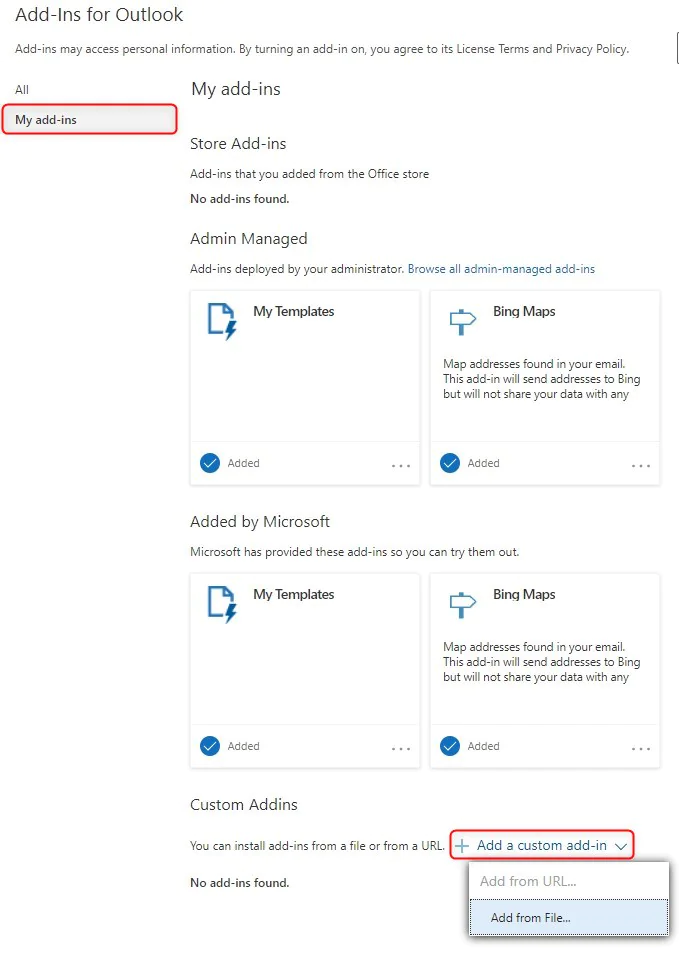
3. In the Add-Ins for Outlook page, click My add-ins on the left panel, then scroll to the bottom and within Custom Addins, click Add a custom add-in. From this drop down,
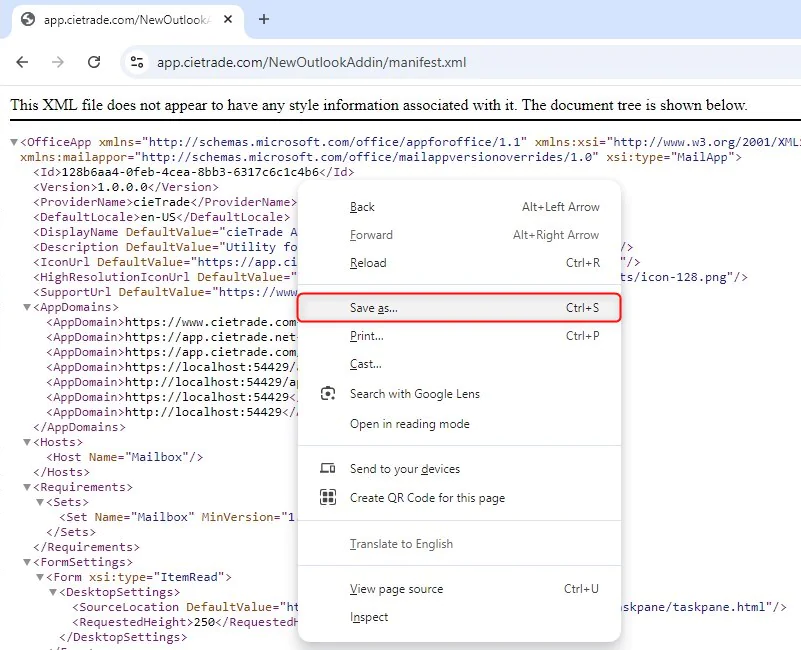
If your account type doesn’t support adding the add-in from URL, before selecting Add from File…, click this link https://app.cietrade.com/NewOutlookAddin/manifest.xml and within the page that it opens in, right-click anywhere in the page, select Save As… and save the file to a preferred location/folder on your machine.
Once you have saved the file, go back to Outlook and click Add from File… to select the file you saved and click Open.
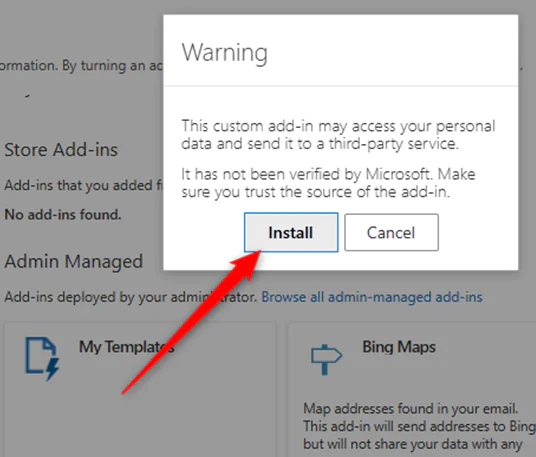
You may receive a warning saying that this is a custom add-in not verified by Microsoft. If so, click Install to continue.
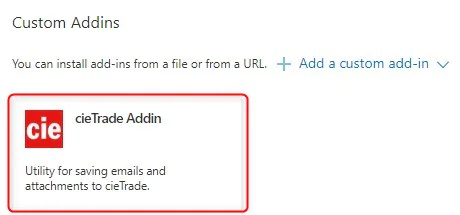
5. If you don’t receive the above Warning to Install, click the cieTrade Addin from the Custom Add-ins section to complete the install.
6. The add-in will now be installed for use. On the first login, you will need to enter credentials as shown below in the Initial Connection steps.
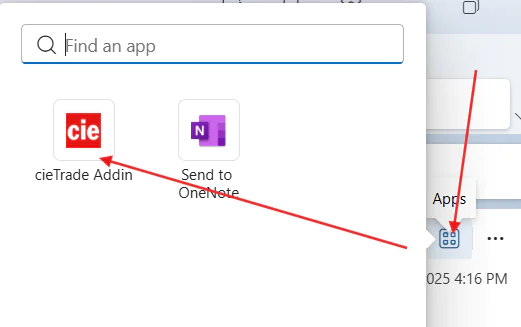
Click on an email, and click the Apps icon. Once installed, you should see the cieTrade Addin in your menu. Click on the icon to open the task bar.
When you first open the add-in, it will ask for your login/set up information.
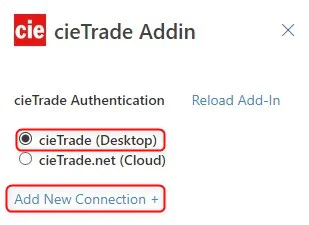
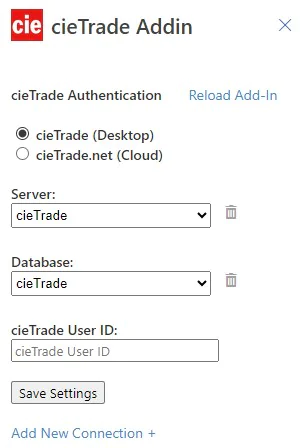
1. In the cieTrade Authentication page, select cieTrade (Desktop) and click Add New Connection +
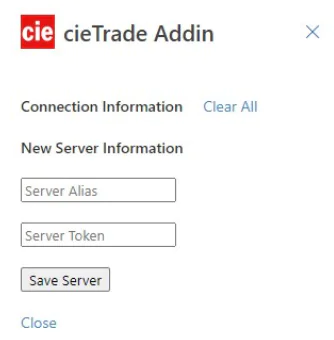
2. In the New Server Information section of the Connection Information page, enter a name for your Server Alias (ex. cieTrade, or the name of your company). Please see next step on how to get your Server Token.
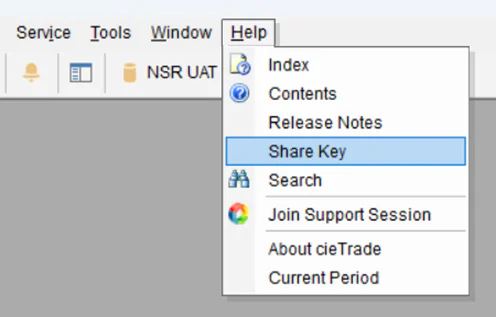
3. To obtain your Server Token, open cieTrade and go to Help | Share Key. Copy & paste the token from the Share Project Key page in cieTrade to the Share Token field in the add-in. Please note: This key is not user-specific.
4. Once you have entered your Server Alias and Server Token, click Save Server.
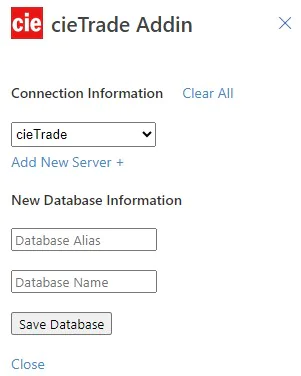
5. In the New Database Information section, enter a Database Alias (ex. cieTrade, or if you have multiple databases, can enter the specific company name for that database), then enter your cieTrade Database Name (if unsure, you can find your database name within cieTrade in Tools | Options | Connections, double-click on the connection name, and you will see your Database Name in the Create Connection page).
6. Once you have entered your Database Alias and Database Name, click Save Database.
7. Lastly, enter your cieTrade User ID that you use to log into cieTrade with.
8. Click Save Settings. The add-in will remember your connection details and you won’t see this screen again unless you log out. Once complete, your cieTrade addin is ready to use!
QUESTIONS?